Step 1: Create Your Own Copy of the Grant Tracking Spreadsheet
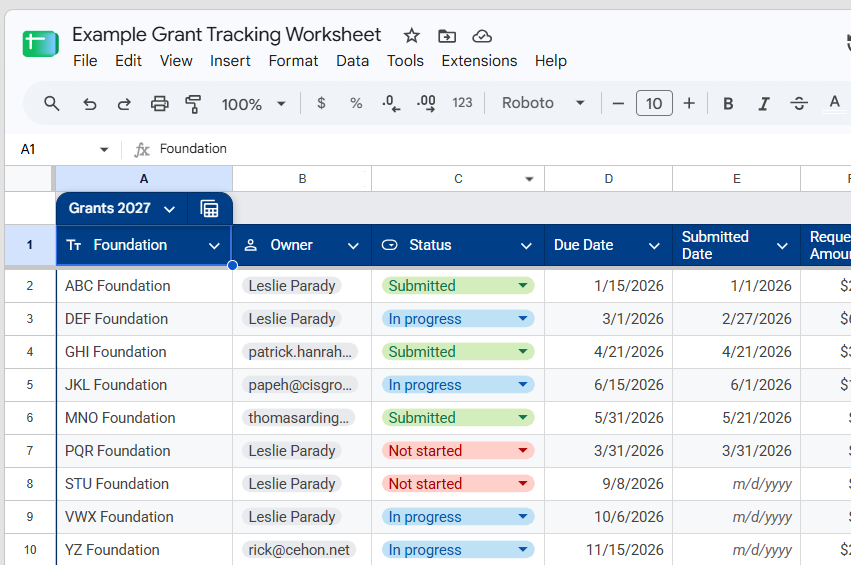
- Open the Grant Tracking Spreadsheet.
- Click Make a Copy when prompted.
- Save the copy to your own Google Drive.
- Rename the file as desired (example: ABC Nonprofit Grant Tracker).
 You now have your own editable spreadsheet.
Step 2: Create Your Own Copy of the Dashboard
- Open the Looker Studio Dashboard Template using the provided link.
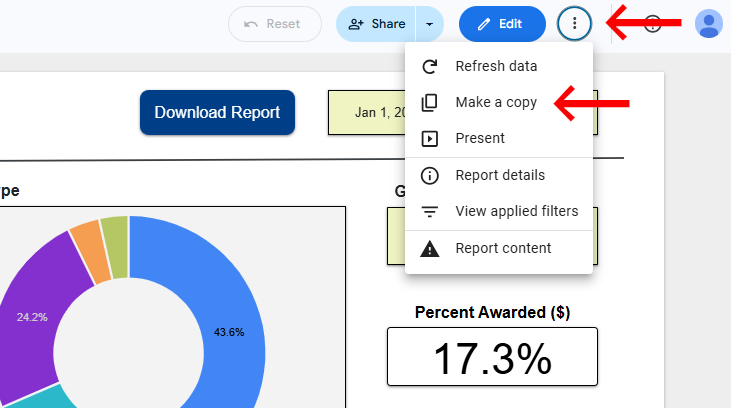
- Click the three dots (⋮) in the upper-right corner of the report and select Make a copy. This creates your own editable version of the dashboard in your Google account.
When you make a copy of the dashboard, it is still pointing to the original demonstration spreadsheet. To make the dashboard display your own grants, you must connect it to your copy of the Grant Tracking Spreadsheet.
Step 3: Link the Dashboard to Your Spreadsheet
During the dashboard copy process:
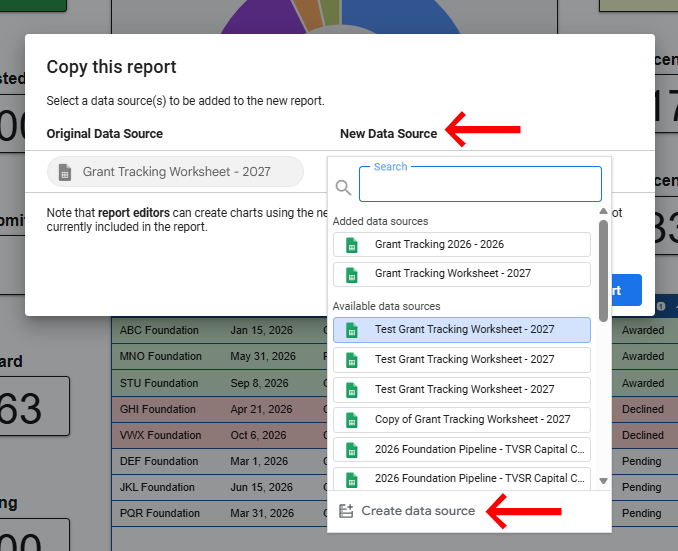
- A pop-up box will open.
- In the pop-up box, choose New Data Source (or Create Data Source).
- Below the dropdown menu, choose Create data source at the bottom.
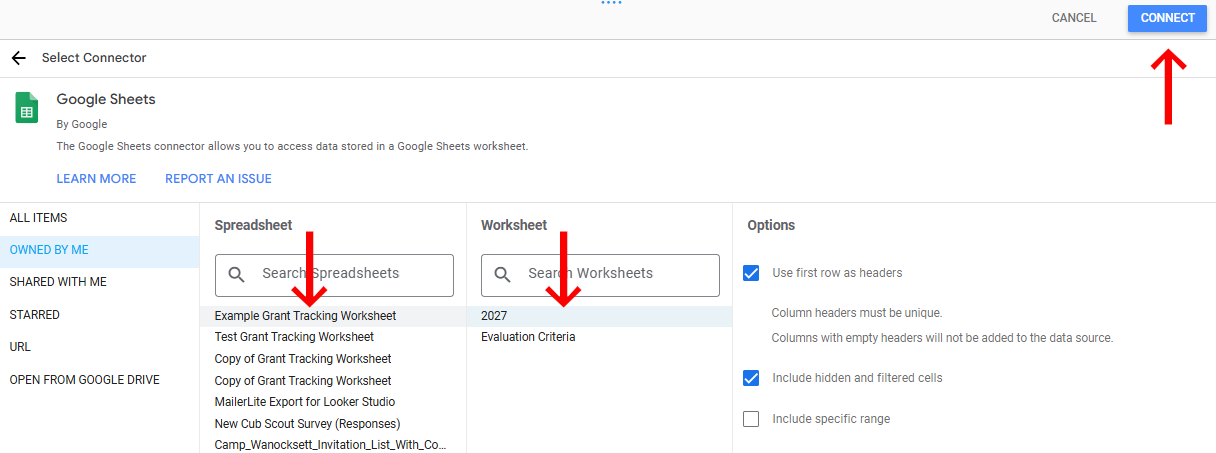
- Select Google Sheets from the Connectors menu.
- Your renamed Grant Tracking Spreadsheet should be at the top of the list.
- Select the renamed spreadsheet. A new window will appear to the right asking you to select the specific worksheet where the dashboard is getting data.
- Select the worksheet for the current grant year (for example, 2027). In future years, you can reconnect the dashboard to a new annual worksheet within the same spreadsheet.
- Click the blue Connect button in the upper right-hand corner.
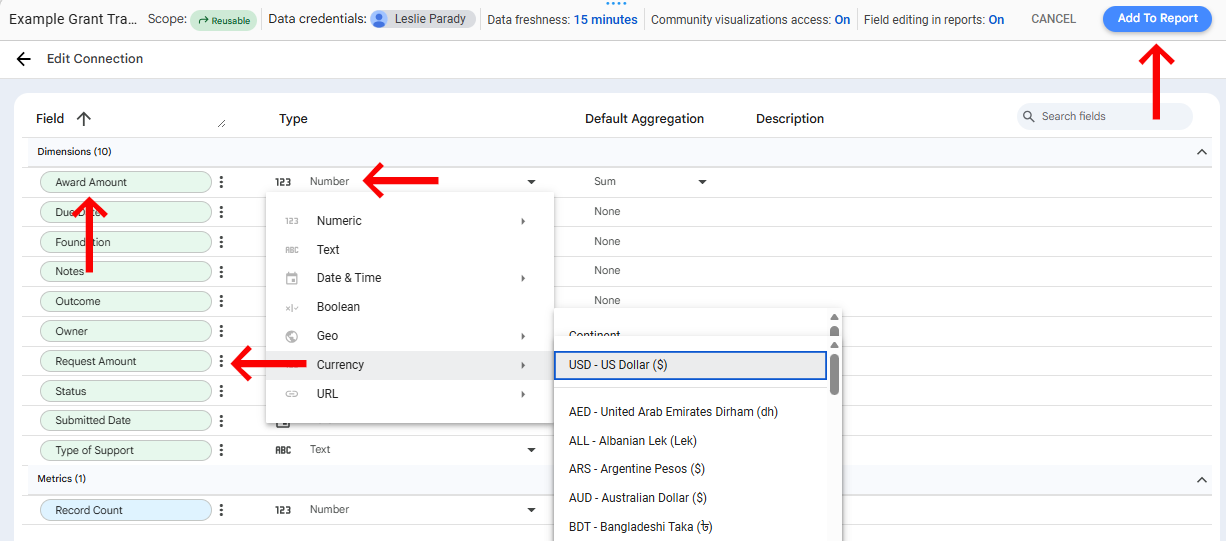
NOTE: After connecting the data source, verify that the Requested Amount and Awarded Amount fields are formatted as Currency in Looker Studio. These fields occasionally revert to Number during the copy process.
- Click the blue Add to Report button in the upper right-hand corner.
Your dashboard is now connected to your spreadsheet. The dashboard may take a few moments to load data the first time. If your charts appear blank, refresh the report.
Step 4: Verify the Connection
Test the setup:
- Open your Grant Tracking Spreadsheet.
- Add a sample grant record.
- Save the entry.
- Return to the dashboard.
- Refresh the report.
The charts, tables, and metrics should update automatically.
Your reporting dashboard is working correctly.